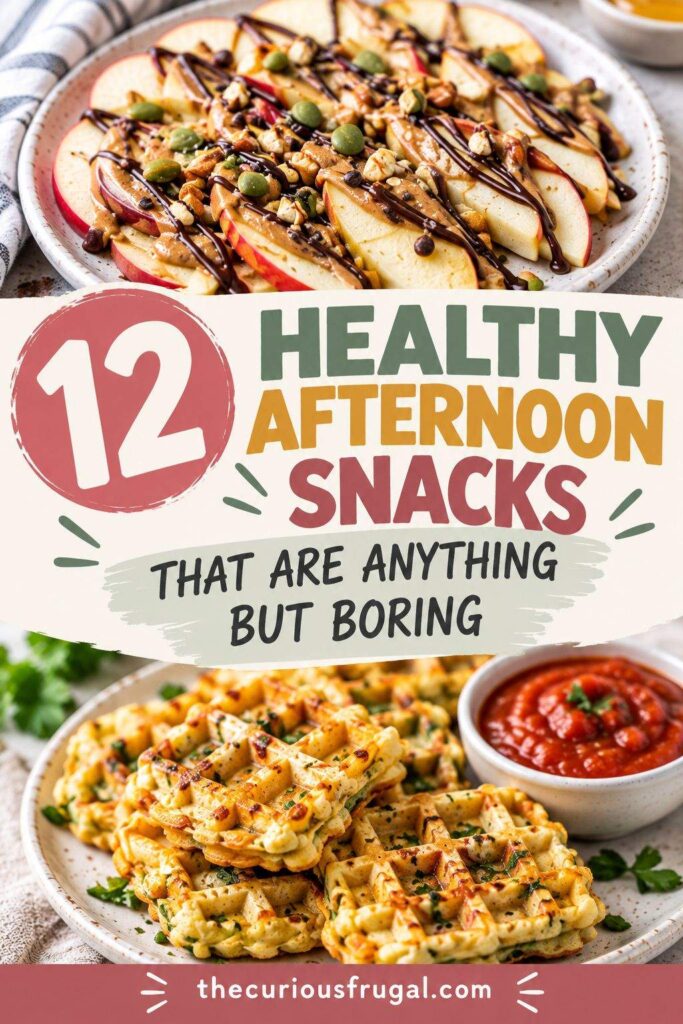

So many healthy afternoon snack lists are just apples with peanut butter, hard-boiled eggs, and a handful of almonds. I like all of those snacks, but we’ve seen them maybe a few too many times. 😅 Here are 12 healthy afternoon snacks that are a little unexpected, easy to make, budget-friendly, and really delicious. Even though they’re a little different, these healthy snacks are still quick to make when the 3pm hunger hits. And better than grabbing the box of Girl Guide cookies in your my cupboard.
This post may contain affiliate links. Please read my disclosure for more info.
Healthy Afternoon Snacks You’ll Actually Look Forward To
Whether you’re in the mood for sweet, salty, crunchy, or a combo, you’ll find something that will satisfy your afternoon snack craving.
Some of these simple afternoon snacks are easy snacks to make in 5 minutes, while others are perfect for making ahead so you have something yummy waiting when hunger strikes.
I made these afternoon snacks for adults but kids will love a lot of them (especially #2 and #5!).
Most of these ideas are very budget-friendly too!
You can also check out these 10 healthy easy recipes for snacks.
Let’s get snacking!
1. Sweet & Crunchy Afternoon Snacks: Cinnamon Sugar Crunchy Chickpeas
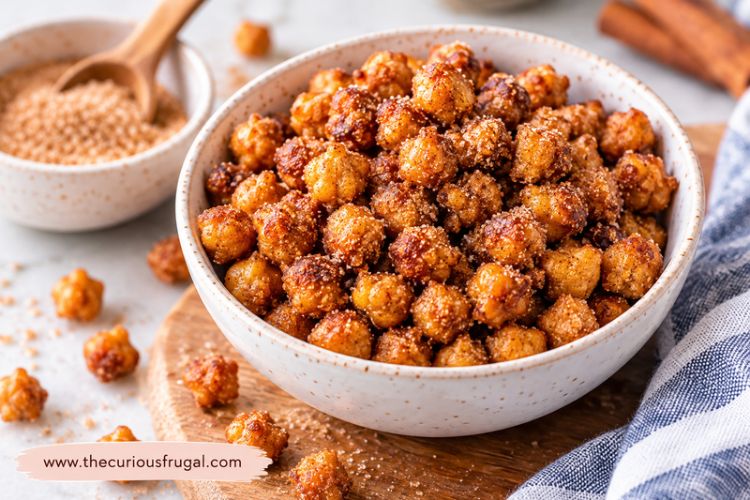
If you love sweet, crunchy snacks but want something a little more satisfying than a handful of cereal, these cinnamon sugar chickpeas are worth trying. They’re packed with fibre, budget-friendly, and surprisingly addictive.
Ingredients
- 1 can chickpeas, drained and dried
- 1 tbsp maple syrup
- 1 tsp cinnamon
- 1 tsp coconut oil or olive oil
- Pinch of salt
How to make them
Preheat your oven to 400°F. Pat the chickpeas very dry, toss with oil, and roast for 20–30 minutes until crisp, shaking the pan occasionally. Toss with cinnamon, maple syrup, and salt, then return to the oven for a few minutes, watching carefully to prevent burning. Let cool before eating.
Make-ahead tip: Store cooled chickpeas in a loosely covered container and enjoy within a day or two for the best crunch.
2. Sweet Afternoon Snacks: Frozen Blueberry Yogurt Clusters

These little frozen treats are creamy, fruity, and covered in dark chocolate. They’re perfect for satisfying a sweet craving during that afternoon slump!
Ingredients
- 1 cup fresh blueberries
- ½ cup plain Greek yogurt (thick works best)
- 1 tsp honey or maple syrup (optional)
- ½ tsp vanilla extract
- ½ cup dark chocolate chips
- 1 tsp coconut oil (optional, for smoother melted chocolate)
How to Make Them
- In a bowl, mix the Greek yogurt, honey or maple syrup (if using), and vanilla extract.
- Gently fold in the blueberries until they’re well coated.
- Line a baking sheet or plate with parchment paper. Spoon small clusters of the blueberry mixture onto the parchment, using about 1–2 tablespoons per cluster.
- Freeze for 1–2 hours, or until completely solid.
- Melt the dark chocolate chips with the coconut oil in the microwave in 20-second intervals, stirring between each.
- Drizzle the melted chocolate over the frozen clusters.
- Return to the freezer for 10–15 minutes until the chocolate has hardened.
Make-ahead tip: Store the clusters in an airtight, freezer-safe container for up to 2 weeks. Enjoy straight from the freezer, letting them sit for a minute or two if they’re too firm to bite.
Kid-friendly tip: Use vanilla Greek yogurt instead of plain for a sweeter version without needing to add honey or maple syrup.
3. Cottage Cheese Mini Waffles for Savory Afternoon Snacks
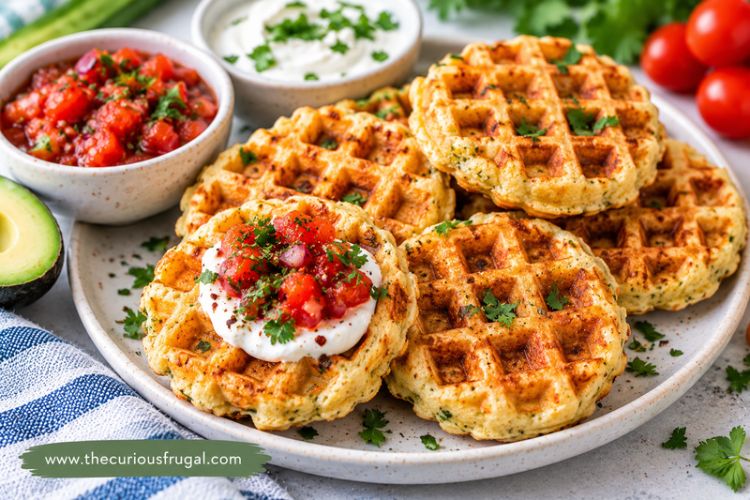
These savory mini waffles are crispy on the outside, soft and cheesy on the inside, and packed with protein! They’re perfect for an afternoon snack when you’re craving something salty instead of sweet. Plus, they’re a fun way to sneak a little extra protein into your kids’ snacks, too.
Ingredients
- ½ cup cottage cheese
- 1 large egg
- ¼ cup rolled oats
- ¼ cup shredded cheddar cheese
- ¼ tsp garlic powder
- ¼ tsp dried Italian seasoning
- Pinch of salt and pepper
- Olive oil or cooking spray for the waffle maker
How to Make Them
- Add the cottage cheese, egg, and rolled oats to a blender. Blend until mostly smooth.
- Stir in the shredded cheddar, garlic powder, Italian seasoning, salt, and pepper.
- Preheat your mini waffle maker and lightly grease it with olive oil or cooking spray.
- Spoon a small amount of batter into the waffle maker, being careful not to overfill it.
- Cook for 3–5 minutes, or until the waffles are golden brown and slightly crispy. Cooking time will depend on your waffle maker.
- Carefully remove the waffles and let them cool for a minute or two to firm up.
- Serve warm with salsa, marinara sauce, or a simple Greek yogurt dip.
Make-ahead tip: Make a batch and refrigerate in an airtight container for up to 3–4 days. Reheat in a toaster or air fryer to bring back their crispy edges. You can also freeze them for up to 2 months.
Kid-friendly tip: Skip the pepper and Italian seasoning if your kids prefer milder flavours. Let them choose their own dipping sauce. Ketchup totally counts! 😄
4. Afternoon Snacks When You’re Craving Something Salty: Crispy Parmesan Smashed Edamame
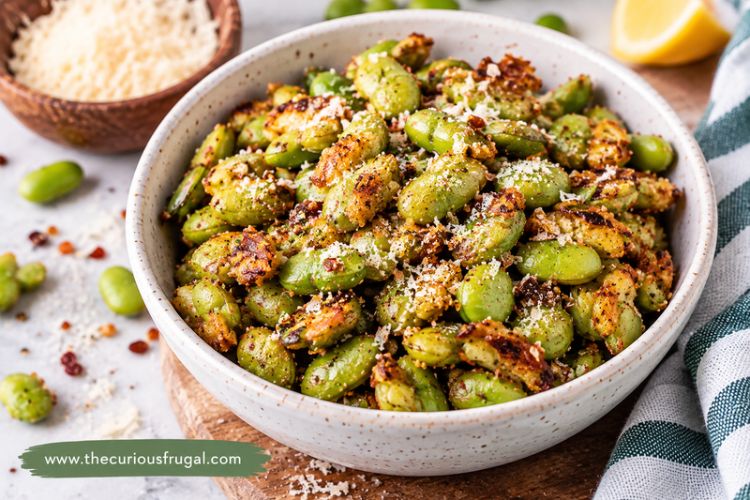
If you’re craving something salty and crunchy at 3pm, these crispy Parmesan smashed edamame are a yummy, healthy alternative to chips. They’re protein-packed, and I love the combo of garlic, Parmesan, and crispy edges. 🤤
Ingredients
- 1 cup shelled edamame (fresh or frozen)
- 1 tbsp olive oil
- 2 tbsp freshly grated Parmesan cheese
- ¼ tsp garlic powder
- ¼ tsp smoked paprika
- Salt and pepper, to taste
- Pinch of red pepper flakes (optional)
How to Make Them
- Preheat your oven to 425°F (220°C) and line a baking sheet with parchment paper.
- If using frozen edamame, cook according to the package directions, then drain and pat thoroughly dry.
- Spread the edamame on the prepared baking sheet. Using the bottom of a glass or a fork, gently press each bean to flatten it slightly.
- Drizzle with olive oil and sprinkle with garlic powder, smoked paprika, salt, and pepper.
- Sprinkle the grated Parmesan evenly over the edamame.
- Roast for 15–20 minutes, checking occasionally, until the edges are golden and crispy. Cooking time may vary depending on your oven and how dry the beans are.
- Let cool for a few minutes before serving. Add red pepper flakes if you like a little heat!
Make-ahead tip: These are best enjoyed fresh from the oven when they’re at their crispiest. You can cook and dry the edamame ahead of time, then season and roast them when you’re ready for a snack.
Budget-friendly tip: Frozen shelled edamame is usually cheaper than fresh and keeps for months in the freezer. It’s an easy ingredient to have on hand for quick, protein-rich afternoon snacks.
5. Apple Nachos with Tahini and Dark Chocolate
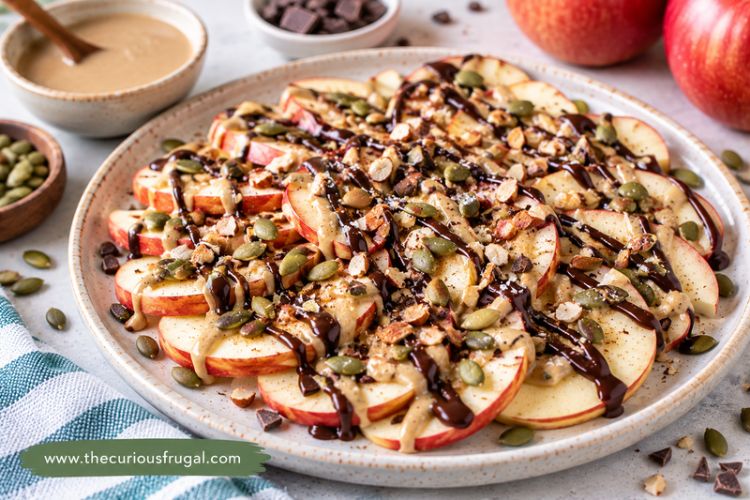
Who says nachos have to be savory? These apple nachos are sweet, crunchy, and just a little indulgent, without being loaded with refined sugar. The combination of crisp apples, creamy tahini, rich dark chocolate, and crunchy pumpkin seeds make these healthy afternoon snacks that feels more like dessert. Plus, they’re ready in about 5 minutes!
Ingredients
- 1 large apple (Honeycrisp, Gala, or Pink Lady work well)
- 1 tbsp tahini
- 1 tbsp dark chocolate chips
- 1 tbsp pumpkin seeds (pepitas)
- 1 tsp maple syrup (optional)
- ½ tsp coconut oil (optional, for melting chocolate)
- Pinch of cinnamon (optional)
How to Make Them
- Wash and core the apple, then slice it into thin wedges or rounds.
- Arrange the apple slices on a plate, overlapping them slightly like nachos.
- If your tahini is thick, stir in a little warm water or maple syrup until it’s thin enough to drizzle.
- Melt the dark chocolate chips with the coconut oil in the microwave in 15–20 second intervals, stirring until smooth.
- Drizzle the tahini over the apple slices, followed by the melted dark chocolate.
- Sprinkle the pumpkin seeds over the top and finish with a pinch of cinnamon, if desired.
- Serve immediately while the apples are crisp and the chocolate is still slightly warm.
Make-ahead tip: This fun afternoon snack is best assembled right before eating, but you can slice the apples ahead of time and toss them with a little lemon juice to help prevent browning. Store the slices in an airtight container in the refrigerator.
Budget-friendly tip: Tahini can be pricey, so if you don’t already have it in your pantry, peanut butter or sunflower seed butter makes a delicious and often cheaper substitute.
Kid-friendly tip: Let kids build their own apple nachos. Set out little bowls of toppings like mini chocolate chips, shredded coconut, crushed nuts, or granola. They can customize their snack, and you might even convince them that fruit nachos are just as exciting as the regular kind.
6. Crispy Rice Paper Pizza Bites

These crispy rice paper pizza bites are a fun, lighter alternative to pizza, with all that cheesy, saucy goodness in a crunchy little package. They’re easy to customize with whatever veggies you have in the fridge, making them a great way to use up leftovers. Plus, they’re ready in about 15 minutes.
Ingredients
- 4 round rice paper wrappers
- ¼ cup pizza sauce or marinara sauce
- ½ cup shredded mozzarella cheese
- 2 tbsp finely chopped bell peppers
- 2 tbsp finely chopped mushrooms or spinach
- ¼ tsp Italian seasoning
- 1 tsp olive oil
- Fresh basil or red pepper flakes (optional)
How to Make Them
- Preheat your oven to 400°F (200°C) and line a baking sheet with parchment paper.
- Lightly brush both sides of each dry rice paper wrapper with olive oil. There’s no need to soak them in water.
- Using kitchen scissors, cut each wrapper into four pieces to make 16 small pizza bases.
- Arrange the rice paper pieces on the baking sheet in a single layer, leaving a little space between them.
- Spread a small amount of pizza sauce on each piece, keeping it away from the edges. Don’t add too much, or the rice paper may become soggy.
- Sprinkle with mozzarella cheese, chopped vegetables, and Italian seasoning.
- Bake for approximately 6–10 minutes, watching closely, until the cheese is melted and the rice paper edges are crispy and lightly golden.
- Remove from the oven and let cool for a minute before serving. Garnish with fresh basil or red pepper flakes if desired.
Make-ahead tip: These are best eaten fresh because rice paper can lose its crunch as it sits. However, you can chop your vegetables and portion out the toppings ahead of time so they’re quick to assemble when the afternoon munchies hit.
Budget-friendly tip: Use whatever vegetables you already have in your fridge! Leftover broccoli, zucchini, or even a few chopped olives work well. You can also use pasta sauce instead of buying a separate jar of pizza sauce.
Kid-friendly tip: Let kids choose their own pizza toppings and create mini personalized pizzas. They’re also a fun after-school snack for kids who love pizza but can’t wait until dinner!
7. Chocolate Avocado Mousse Cups
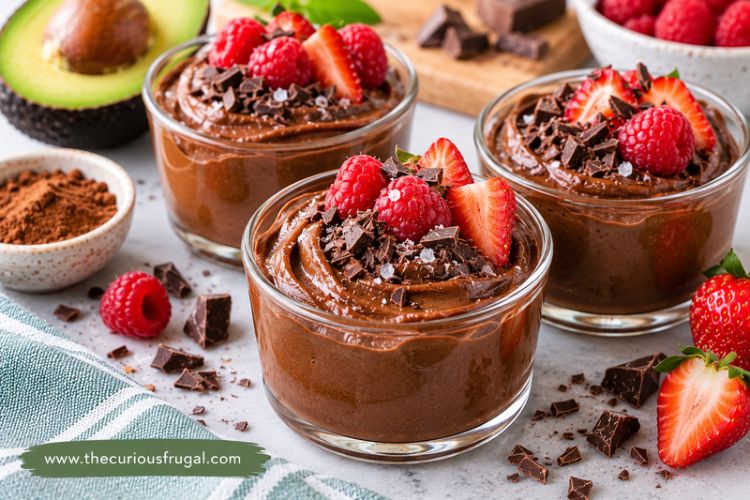
Healthy chocolate mousse! These rich and creamy chocolate avocado mousse cups are dessert-like afternoon snacks, but they’re made with simple, wholesome ingredients. The avocado adds a silky-smooth texture and healthy fats without an overpowering flavor. They’re perfect for satisfying those 3pm chocolate cravings without reaching for a candy bar!
Ingredients
- 1 large ripe avocado
- 3 tbsp unsweetened cocoa powder
- 2–3 tbsp maple syrup (adjust to taste)
- ¼ cup milk of choice (dairy or plant-based)
- ½ tsp vanilla extract
- Pinch of salt
- Fresh raspberries or strawberries, for topping
- Dark chocolate shavings (optional)
How to Make Them
- Cut the avocado in half, remove the pit, and scoop the flesh into a blender or food processor.
- Add the cocoa powder, maple syrup, milk, vanilla extract, and salt.
- Blend until completely smooth and creamy, scraping down the sides as needed.
- Taste and adjust the sweetness. If the mousse is too thick, add a little more milk, one tablespoon at a time.
- Spoon the chocolate mousse into 2–3 small serving cups or glasses.
- Refrigerate for at least 30 minutes to allow the mousse to chill and thicken slightly.
- Top with fresh raspberries, sliced strawberries, or a sprinkle of dark chocolate shavings before serving.
Make-ahead tip: These mousse cups are perfect for preparing ahead of time. Store them covered in the refrigerator for up to 2 days. Press a little plastic wrap directly against the surface of the mousse to help minimize browning.
Budget-friendly tip: Buy avocados when they’re on sale and freeze the ripe flesh in portions. Thaw it in the refrigerator before blending. Frozen avocado works well in creamy recipes like this, so you don’t have to worry about perfectly timing your avocado’s approximately 12-minute window of ripeness. 🙂
Kid-friendly tip: Serve the mousse in little dessert cups with a few chocolate chips or berries on top. You don’t even have to mention the avocado right away lol. It’s a fun way to introduce kids to a familiar treat made with an unexpected ingredient.
8. Cucumber Sushi Bites: Whole Food Afternoon Snacks
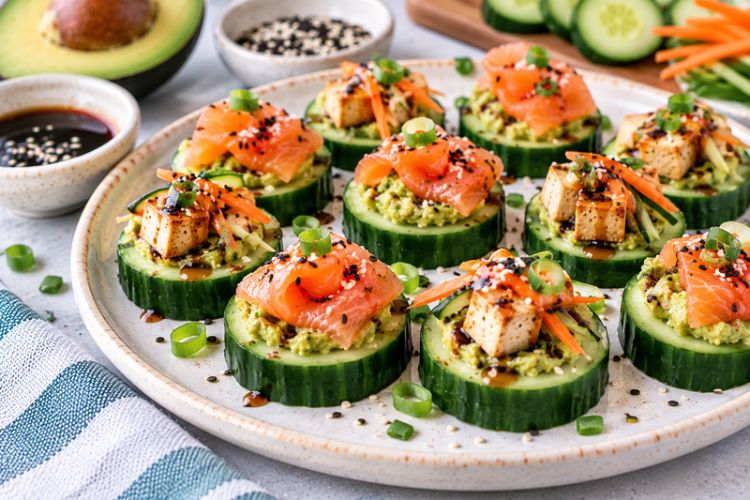
Love sushi but don’t feel like rolling anything? These cucumber sushi bites give you all those fresh, delicious sushi flavors without the fuss! Crisp cucumber slices are topped with creamy avocado, smoked salmon (or tofu!), and a sprinkle of sesame seeds. They’re light, refreshing, packed with nutrients, and perfect for when you want healthy afternoon snacks.
Ingredients
- 1 large English cucumber
- ½ ripe avocado
- 2 oz (about 55 g) smoked salmon or firm tofu
- 1 tsp soy sauce or tamari
- 1 tsp sesame seeds
- 1 tsp lemon or lime juice
- 1 green onion, finely chopped (optional)
- Sriracha or spicy mayo, for drizzling (optional)
How to Make Them
- Wash the cucumber and slice it into thick rounds, approximately ½ inch thick.
- In a small bowl, mash the avocado with the lemon or lime juice until creamy.
- Arrange the cucumber slices on a serving plate.
- Spoon a small amount of mashed avocado onto each cucumber round.
- Cut the smoked salmon into small pieces and gently fold or place one piece on top of each avocado-covered cucumber slice. If using tofu, cut it into small cubes and use cooked, seasoned tofu.
- Sprinkle the bites with sesame seeds and finely chopped green onion.
- Drizzle lightly with soy sauce or tamari just before serving.
- Add a little sriracha or spicy mayo if you like some heat!
Make-ahead tip: These are best assembled right before eating so the cucumber stays crisp and the avocado doesn’t brown. However, you can slice the cucumber and prepare the toppings a few hours ahead. Store everything separately in the refrigerator until you’re ready to assemble.
Budget-friendly tip: Smoked salmon can be expensive, so try using seasoned tofu, canned salmon, or even leftover cooked chicken instead. You’ll still get a delicious, protein-rich snack without spending a fortune.
Kid-friendly tip: Skip the spicy toppings and let kids assemble their own cucumber sushi bites. For picky eaters, try a little cream cheese instead of avocado and top with shredded carrots or small pieces of cooked chicken. They’re like tiny edible building blocks!
9. Warm Cinnamon Pears with Whipped Ricotta
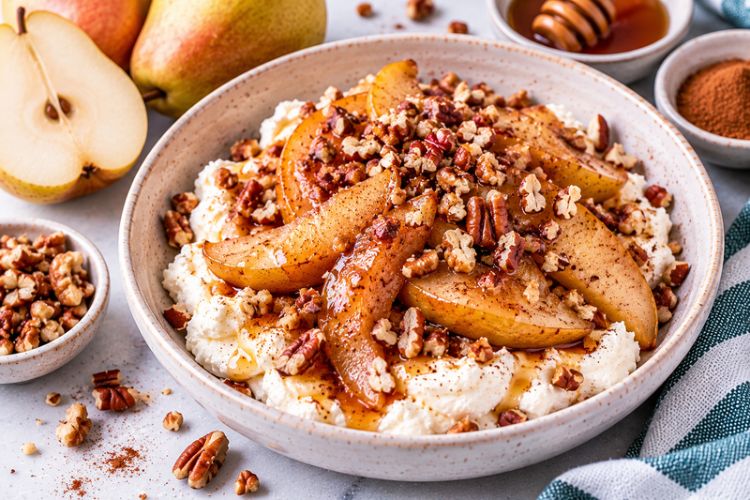
I can’t wait to make this one when the weather gets cooler. This feels like total 3pm healthy comfort food!
Cinnamon-spiced pears are paired with creamy whipped ricotta and a drizzle of honey, making it the perfect afternoon snack when you’re craving something sweet and comforting.
Ingredients
- 2 ripe pears (such as Bartlett or Bosc)
- 1 tbsp butter or olive oil
- 1 tsp cinnamon
- 1 tbsp maple syrup or honey (plus extra for drizzling)
- ½ tsp vanilla extract
- ½ cup ricotta cheese (whole milk or part-skim)
- 1–2 tbsp milk (dairy or plant-based)
- Pinch of salt
- Chopped walnuts or pecans (optional)
- Extra cinnamon, for garnish (optional)
How to Make Them
- Wash, core, and slice the pears into thin wedges.
- Heat the butter or olive oil in a skillet over medium heat.
- Add the pears, cinnamon, and maple syrup or honey. Cook for 5–7 minutes, stirring occasionally, until the pears are tender and slightly caramelized.
- Remove from the heat and stir in the vanilla extract. Set aside.
- In a small bowl, whip the ricotta with 1–2 tablespoons of milk and a pinch of salt until smooth and creamy. You can use a fork, whisk, or hand mixer.
- Spoon the whipped ricotta into serving bowls and top with the warm cinnamon pears.
- Drizzle with a little extra honey and sprinkle with chopped nuts and a pinch of cinnamon, if desired.
Make-ahead tip: You can cook the pears ahead of time and store them in an airtight container in the refrigerator for up to 3 days. Reheat gently on the stovetop or in the microwave before serving. The ricotta can also be whipped ahead and refrigerated separately.
Budget-friendly tip: Buy pears when they’re in season or on sale. Slightly overripe pears work well for this recipe, too, making it a delicious way to use up fruit before it goes to waste.
Kid-friendly tip: These afternoon snacks are naturally sweet and mild, making it a great option for kids. You can skip the nuts if needed and let kids add their own toppings, like a drizzle of honey or an extra sprinkle of cinnamon.
10. Crispy Polenta Fries
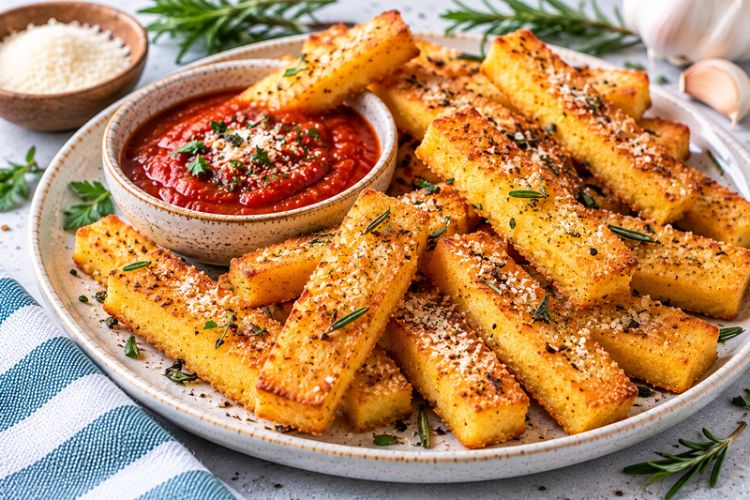
These crispy polenta fries are golden and crunchy on the outside, soft and creamy on the inside, and full of delicious garlic and rosemary flavor. They’re a fun alternative to potato fries and perfect for dipping into warm marinara sauce. Plus, they’re made with just a handful of simple ingredients you might already have in your pantry!
Ingredients
- 1 tube (about 500 g or 18 oz) prepared, firm polenta
- 1 tbsp olive oil
- ½ tsp garlic powder
- ½ tsp dried rosemary (or 1 tsp fresh, finely chopped)
- ¼ tsp smoked paprika (optional)
- Salt and pepper, to taste
- 2 tbsp grated Parmesan cheese (optional)
- ½ cup marinara sauce, for dipping
How to Make Them
- Preheat your oven to 425°F (220°C) and line a baking sheet with parchment paper.
- Remove the prepared polenta from its packaging and pat it dry with paper towels.
- Slice the polenta into fry-shaped sticks, approximately ½ inch thick.
- Place the polenta fries in a large bowl and gently toss with olive oil, garlic powder, rosemary, smoked paprika, salt, and pepper.
- Arrange the fries in a single layer on the prepared baking sheet, leaving a little space between each one.
- Bake for 25–35 minutes, flipping halfway through, until the fries are golden brown with crispy edges.
- If using Parmesan cheese, sprinkle it over the fries during the last 5 minutes of baking.
- Warm the marinara sauce in a small saucepan or microwave-safe bowl.
- Serve the crispy polenta fries hot with marinara sauce for dipping.
Make-ahead tip: You can slice and season the polenta ahead of time and refrigerate it in an airtight container for up to 2 days. Leftover cooked fries can be refrigerated for 3–4 days and reheated in an air fryer or oven to help restore their crispy texture.
Budget-friendly tip: Making your own polenta from dry cornmeal is often cheaper than buying the prepared tubes. Cook the polenta according to the package directions, spread it into a greased baking dish, and refrigerate until completely firm before slicing into fries.
Kid-friendly tip: These are a fun alternative to regular French fries! Serve them with ketchup, pizza sauce, or your kids’ favourite dip. You can also skip the rosemary and use a little Parmesan cheese for a milder, cheesy version that picky eaters might enjoy.
11. Raspberry Cheesecake Stuffed Dates: Healthy Dessert-Like Afternoon Snacks
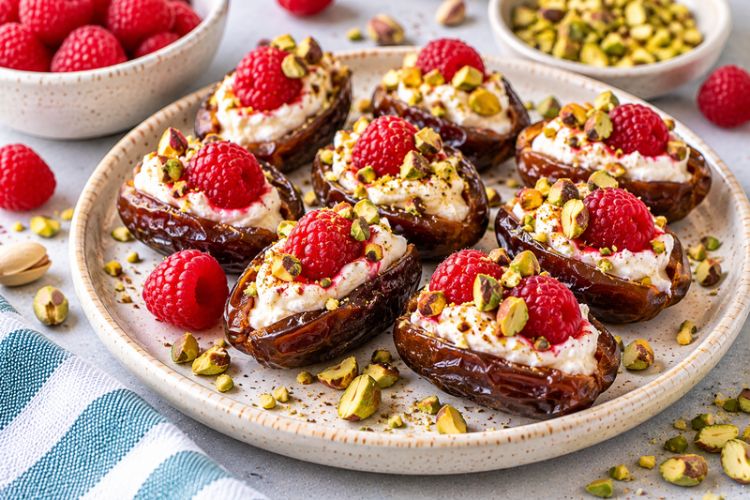
I love the idea of having cheesecake for an afternoon snack. 🙂
These raspberry cheesecake stuffed dates are so simple, but it’s definitely something unique instead of reaching for the same old yogurt and apple combo!
Medjool dates already taste like caramel, and they are filled with a creamy cheesecake mixture, topped with juicy raspberries, and finished with crunchy pistachios. They’re the perfect healthy afternoon snack when you’re craving sweet.
Ingredients
- 8 large Medjool dates
- 2 tbsp cream cheese, softened
- 2 tbsp plain Greek yogurt
- ½ tsp vanilla extract
- 1 tsp maple syrup or honey (optional)
- 8 fresh raspberries
- 2 tbsp chopped pistachios
How to Make Them
- Using a small knife, carefully slice each date lengthwise and remove the pit, keeping the date intact so it forms a little pocket.
- In a small bowl, mix the softened cream cheese, Greek yogurt, vanilla extract, and maple syrup or honey (if using) until smooth and creamy.
- Spoon approximately 1 teaspoon of the cheesecake mixture into each date. You can also use a piping bag or a small zip-top bag with the corner snipped off for a prettier presentation.
- Gently press one fresh raspberry into the cheesecake filling of each date.
- Sprinkle the chopped pistachios over the top.
- Arrange the stuffed dates on a plate and refrigerate for 15–20 minutes to let the filling firm up slightly.
- Serve chilled and enjoy!
Make-ahead tip: These stuffed dates are perfect for prepping ahead! Store them in an airtight container in the refrigerator for up to 2 days. For the best texture, add the raspberries and pistachios shortly before serving.
Budget-friendly tip: Medjool dates and pistachios can be a little pricey, so look for dates in bulk or on sale. You can also substitute chopped walnuts, almonds, or sunflower seeds for the pistachios. Regular pitted dates work too, although they’re smaller and less soft, so you may need to use less filling.
Kid-friendly tip: These little treats are like mini cheesecakes without the baking! Let kids help spoon in the filling and add their favourite toppings. Try mini chocolate chips, crushed graham crackers, or colourful berries for a fun after-school snack.
12. Sweet Potato Toast Bites with Feta and Chili Honey
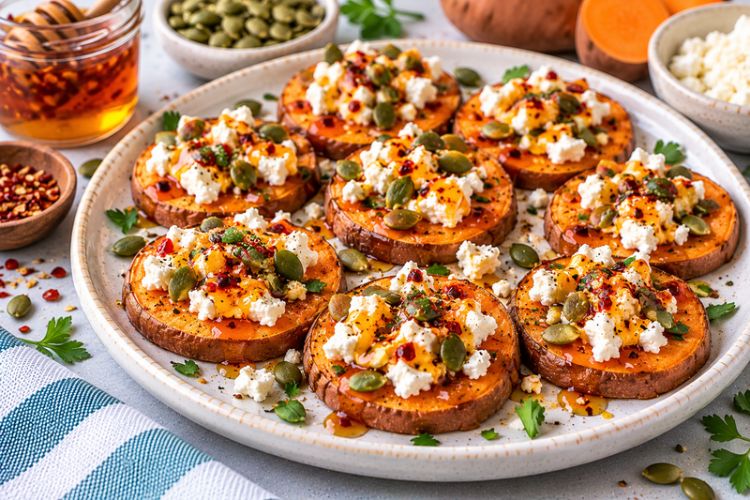
These sweet potato toast bites with feta and chili honey are a delicious way to shake up your usual afternoon snack rut. Roasted sweet potato rounds are topped with tangy feta cheese, crunchy pumpkin seeds, and a drizzle of sweet and spicy honey. They look a little fancy, but they’re surprisingly easy to make and packed with flavour. Perfect for when you’re craving something more exciting than crackers and cheese!
Ingredients
- 1 medium sweet potato
- 1 tbsp olive oil
- ¼ cup crumbled feta cheese
- 2 tbsp pumpkin seeds (pepitas)
- 1 tbsp honey
- ¼ tsp red pepper flakes (adjust to taste)
- Salt and pepper, to taste
- Fresh parsley or cilantro, for garnish (optional)
How to Make Them
- Preheat your oven to 425°F (220°C) and line a baking sheet with parchment paper.
- Wash the sweet potato thoroughly and slice it into rounds approximately ¼ inch thick. There’s no need to peel it unless you prefer to.
- Arrange the sweet potato rounds on the prepared baking sheet in a single layer.
- Brush both sides lightly with olive oil and sprinkle with salt and pepper.
- Roast for 20–25 minutes, flipping halfway through, until the sweet potatoes are tender and lightly golden around the edges.
- While the sweet potatoes are roasting, combine the honey and red pepper flakes in a small microwave-safe bowl. Warm for about 10 seconds, just until the honey becomes runny. Stir to combine.
- Remove the sweet potato rounds from the oven and let them cool for a minute or two.
- Top each round with a little crumbled feta cheese and a sprinkle of pumpkin seeds.
- Drizzle lightly with the chili honey and garnish with fresh parsley or cilantro, if desired.
- Serve warm and enjoy!
Make-ahead tip: Roast the sweet potato rounds ahead of time and store them in an airtight container in the refrigerator for up to 3–4 days. When you’re ready for a snack, reheat them in the oven or air fryer until warmed through, then add the toppings. Store the feta, pumpkin seeds, and chili honey separately until serving.
Budget-friendly tip: Sweet potatoes are cheap, filling, and there are lots of things you can do with them. Buy them when they’re on sale and use any leftovers for soups, roasted vegetable bowls, or breakfast hashes. You can also substitute sunflower seeds for pumpkin seeds or use whatever crumbly cheese you already have in the fridge.
Kid-friendly tip: Skip the chili flakes and drizzle the sweet potato rounds with plain honey instead. You can also swap the feta for shredded cheddar or mozzarella if your kids prefer milder cheese. Let them add their own toppings for a fun, build-your-own afternoon snack!
Related post: Soccer Snacks for the Team: 15 Healthy & Budget-Friendly Ideas Kids Will Love
Pin these afternoon snacks ideas to save: